Test Azure Functions locally with Azure Active Directory
Test Azure Functions locally with Azure Active Directory
In this example we are authenticate a using our client, Postmanl, allowing it to access our Azure Function.
Solution referenced in this blog post: Reference Solution from Sahil Malik
Create a new app registration for the function/api
- Azure Active Directory -> App Registrations -> New Registration
- Enter a name
- For this example use https://localhost:7071 as the redirect URI
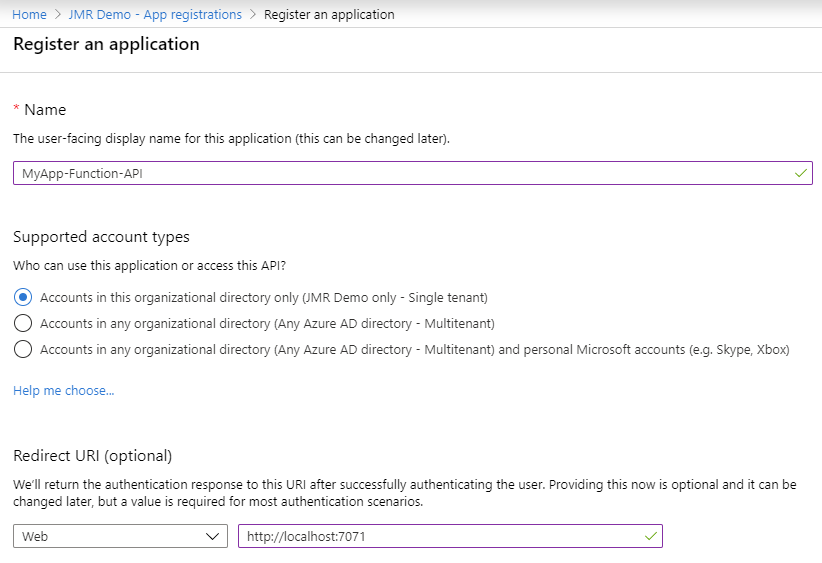
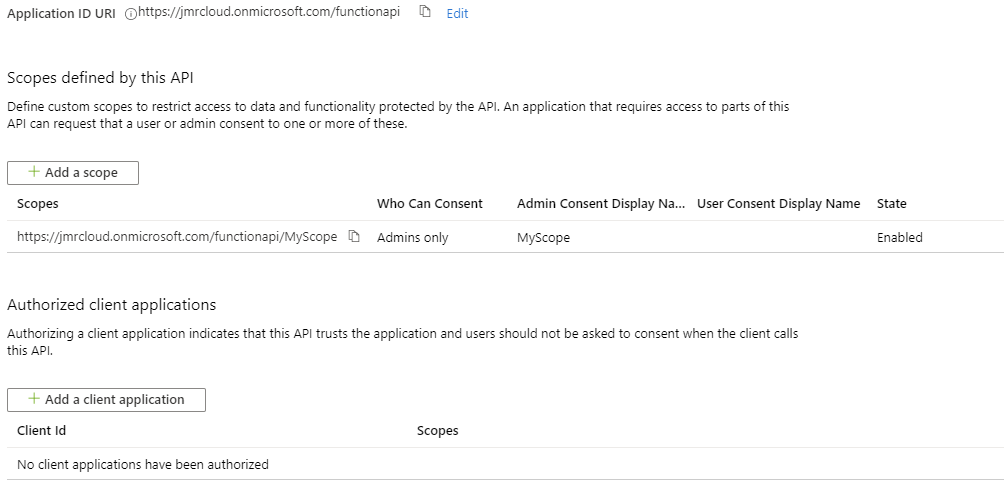
- Expose an API -> Application ID URL Set
- The actual url does not matter but I use this format: https://tenantid.onmicrosoft.com/functionapi
- So for me its https://jmrcloud.onmicrosoft.com/functionapi
- Click Add Scope
- Enter in MyScope for the name, leave defaults and Add Scope.
Once completed it should look like this:
Create and configure client app registration
In our case, the client is Postman but will be a reactjs app in the future.
Create
- Azure Active Directory -> App Registrations -> New Registration
- Enter a name
- We can leave the redirect URI blank
Configure Authentication
- From within the App Registration page, click on Authentication
- Click on Add a Platform , Select Web
- Enter in https://localhost:7071 (again, for example purposes only)
- Check ID tokens under implicit grant, Click configure
Generate Secret
- Click on Certificates & Secret, New Client Secret
- Generate a new secret and copy it somewhere safe. We will use it later
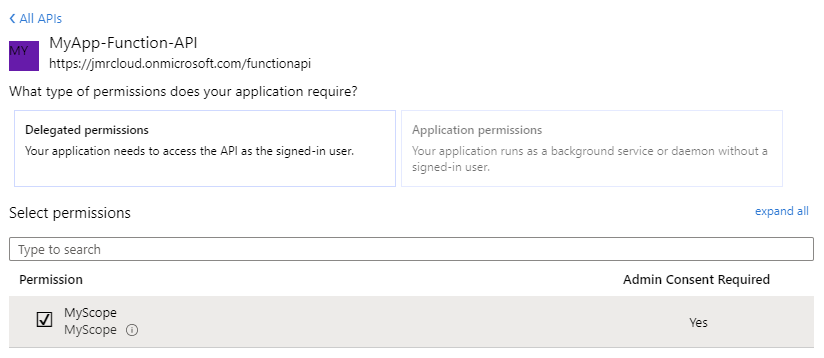
Set API Permissions
- Click on API Permissions -> Add a permission -> My APIs
- You should see your function api scope that was created earlier.
- Select it and check the box next to the scope you created
- Click Add Permissions
- Click Gran admin consent for [Tentant Name]
Configure Function App
Using the values from the Function App API app registration lets configure the function app.
Open up Constants.cs and update the following:
1
2
3
4
internal static string audience = "https://<tenantname>.onmicrosoft.com/url"; // Get this value from the expose an api
internal static string clientID = "<appid>"; // this is the client id, also known as AppID. This is not the ObjectID
internal static string tenant = "<tenantname>.onmicrosoft.com"; // this is your tenant name
internal static string tenantid = "<tenantid>"; // this is your tenant id (GUID)
Build and run the application and leave it running in the background.
Authenticate via Browswer to Obtain Token
- Construct the following url and paste it into your browser.
- Replace items noted with your own values from the Client App Registration
1
https://login.microsoftonline.com/{TENANT NAME}.onmicrosoft.com/oauth2/v2.0/authorize?response_type=code&client_id={CLIENT ID}&redirect_uri={REDIRECT URL}&scope=openid {APPLICATION SCOPE FROM API REGISTRTION}
- Paste that into a browser
- It will authenticate and redirect you localhost:7071 where your function is running
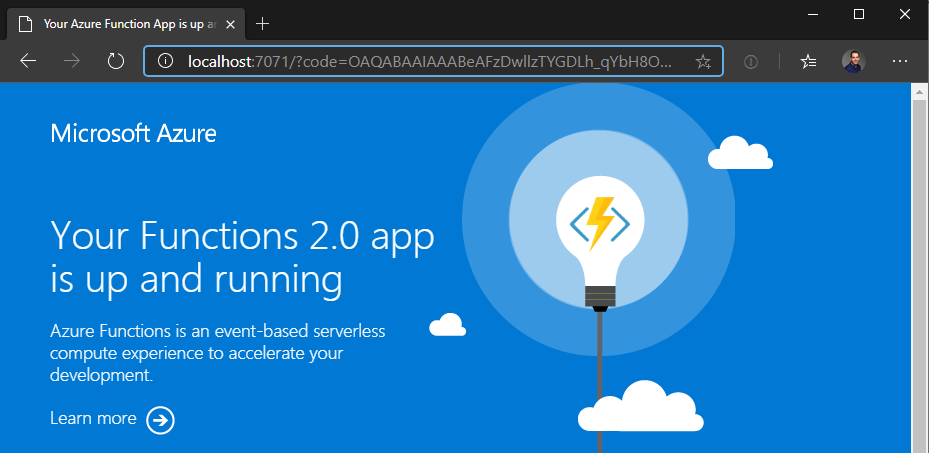
Grab the url from the browser and copy the value for code and keep it handy. https://localhost:7071/?code=[GRAB THIS VALUE]&session_state=64fae8b1-bb95-427e-9f42-086e28e1fc92
Use Postman to Generate Auth Token
Create a new HTTP POST in Postman with the following settings:
- POST: https://login.microsoftonline.com/tenantname.onmicrosoft.com/oauth2/v2.0/token
- Headers:
- Content-Type: application/x-form-urlencoded
- Body:
- redirect_uri: https://localhost:7071/
- client_id: client id of client app registration
- grant_type: authorization_code
- client_secret: value that you saved earlier
- code: the code that you saved from the previous section
- scope: the scope you created
You should get a response back that looks like the following:
>1
2
3
4
5
6
7
8
{
"token_type": "Bearer",
"scope": "https://jmrcloud.onmicrosoft.com/functionapi/MyScope",
"expires_in": 3599,
"ext_expires_in": 3599,
"access_token": "eyJ0eXAiOiJKV1QiLCJhbGciOiJSUzI1NiIsIng1d...",
"id_token": "eyJ0eXAiOiJKV1QiLCJhbGciOiJSUzI1NiIsImtpZC..."
}
Copy the contents of the access_token feild as we will use it in the next section to authorize our request.
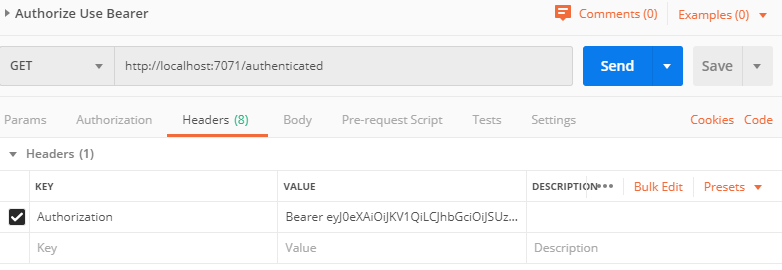
Add Bearer token to authenticate local function requests
Create a new HTTP POST in Postman with the following settings:
- GET: https://localhost:7071/authenticated
- This is the same function app to test if authenteication is working. You can substitue this for your application.
- Headers:
- Authorization: Bearer access_token
- Upon submitting you should get your AAD username back as a response.
- Any request you want to authenticate must include the header with the bearer token.
This post is licensed under CC BY 4.0 by the author.