Azure Functions with Multiple Output Bindings
Recently while working on a partner project, it was required that we build an Azure Function that not only outputs to an Azure Storage Queue, but also archives that same message in Azure Storage. While the concept itself is simple, I wanted to use the built in Azure Functions bindings to do this as simply and cleanly as possible. After a little research, it turns out this is possible and very easy to implement.
The following walks you through how to create an Azure Function with a manual trigger that both sends a message to Azure Table Storage and Azure Queue Storage through built in Azure Function Bindings.
As with anything, there are multiple ways you can do this. I will walk you through from the very beginning starting with the easiest method, through the Azure Portal.
The following assumes you have an Azure Account. If not you can sign up for a free trial here or you can try the Azure Functions for free by clicking here.
If you would like to skip the tutorial and go right to the code, you can view the repo here: Azure Functions Multiple Output Bindings.
Create a new Function App (you can skip this step if you are using the try Azure Functions demo)
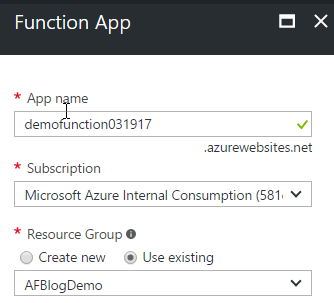
This will create your Azure Function App Service and a corresponding blob storage account. For the demo we will use this blob storage account but technically you could use any by utilizing the connection string.
Browse to the new function app you created. Click on new function, choose C#, then ManualTrigger-CSharp and click create.
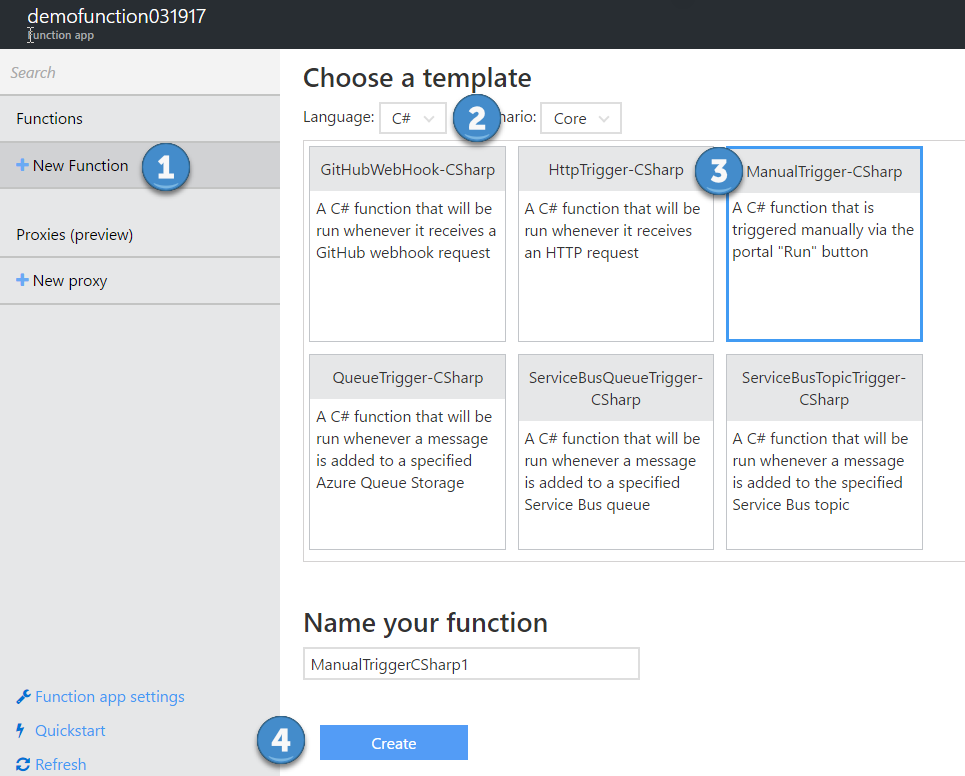
Note; We are doing a manual trigger for demo purposes but you could use any of the triggers available.
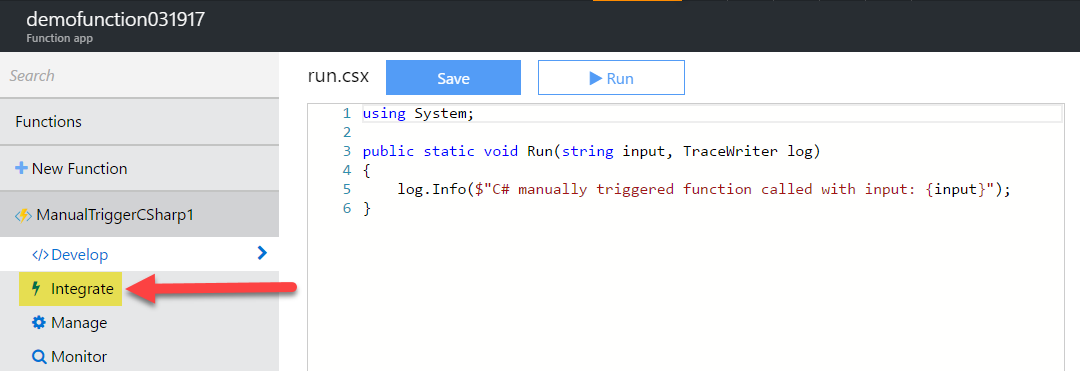
Great! Now we have an Azure Function created. Lets add some output bindings. Click on “Integrate”
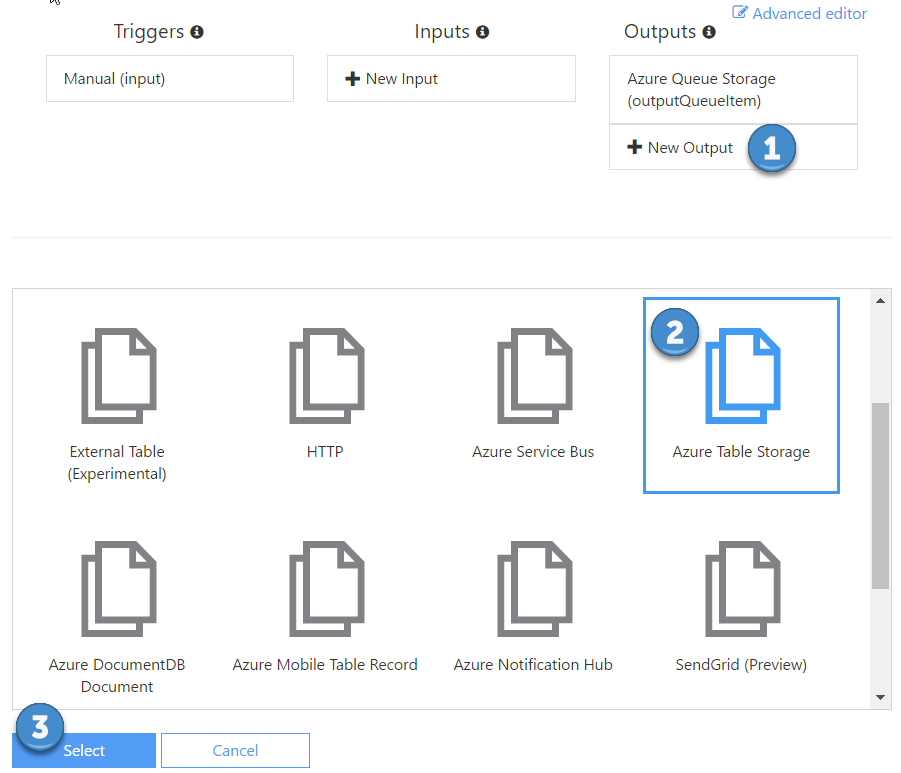
From here, we can easily add multiple output bindings through the interface.
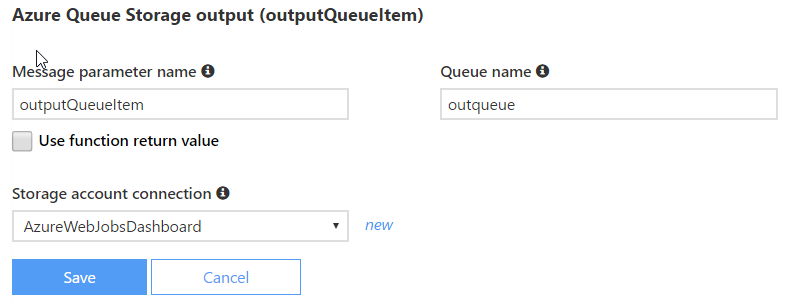
Click on New Output, choose Azure Queue Storag_e and click _Select

Leave all the default values and click S_ave_. We will come back to these later.
Again, click on New Output, this time choose Azure Table Storage, and hit Select.
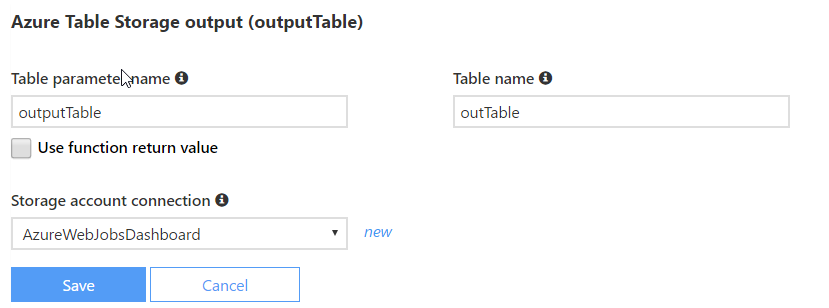
Again, let’s leave all the default values and click Save.
Behind the scenes, the portal interface has been modifying your function.json file which contains all the trigger and binding information for your Azure Function. Your function.json should now look like this.
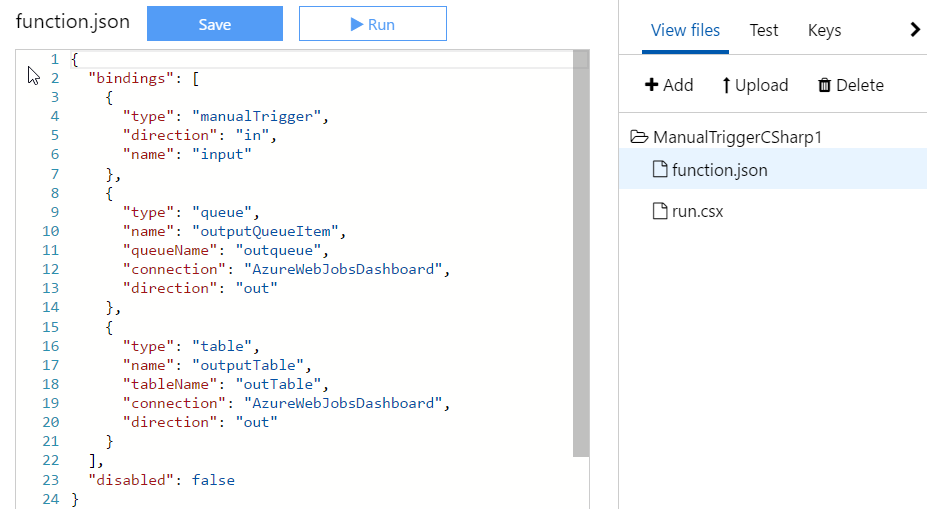
You can get to this by click on “view files” and selecting function.json.
function.json tells the Azure Function that you now have two output binding and holds their configuration values. In this case we want to output to a table named outputTable and a storage queue names outqueue. All this using the default connection to the storage account we created.
Note; you do not have to create the Azure Storage Queue or Table. It will automatically be created if it does not exist.
All we need to do now is add some code to the function to send data to those bindings.
Let’s go back to our run.csx and replace all the code with the following:
1
2
3
4
5
6
7
8
9
10
11
12
13
14
15
16
17
18
19
20
21
22
23
24
25
26
27
28
29
30
31
32
33
using System;

public static void Run(string input, TraceWriter log, out string outputQueueItem, ICollector<FaceResult> outputTable)
{
    log.Info($"C# manually triggered function called with input: {input}");

    // DO SOMETHING
    // Your custom function code goes here
    // i.e. cognitive services face detection

    // Create message
    string msg = $"Notification! 25 Faces Detected";
    log.Info(msg);

    // Store message in Azure Table Storage
    outputTable.Add(
        new FaceResult() {
            PartitionKey = "FaceTracking",
            RowKey = Guid.NewGuid().ToString(),
            Message = msg }
        );
    // Store message in Azure Storage Queue
    outputQueueItem = msg;

}

// Example class to storage messages regarding face detection
public class FaceResult
{
    public string PartitionKey { get; set; }
    public string RowKey { get; set; }
    public string Message { get; set; }
}
Click save and if you did everything correctly you should see Compilation Succeeded

That’s it! You now have an Azure Function that can easily write to Azure Table Storage and Azure Storage Queue using built in Output bindings and very little code.
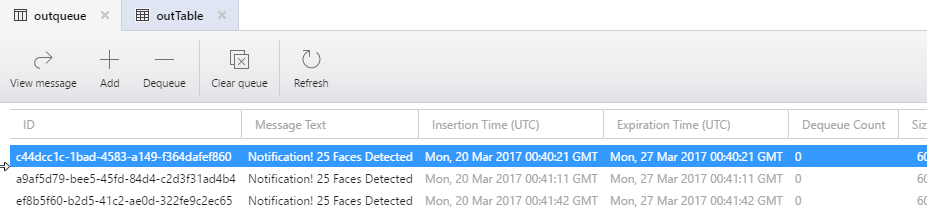
If you go ahead and run it you should get the following message. In addition, if you open the storage account for the function you will see the new table and queue created with the messages stored.