** UPDATE – PLEASE READ **
Please visit: https://docs.microsoft.com/en-us/aspnet/core/security/authentication/social/google-logins for updated instructions on how to use Google Authentication with ASP.NET Core.
The instructions in this article are out of date and I have not yet had a chance to update it.
While speaking with some local developers about ASP.NET Core I was asked if integrating Google Authentication was just as easy in ASP.NET Core, Core MVC (MVC6) as it was in the past. I honestly had not tested it yet so I decided to give it a shot. Thankfully, its very simple, but slightly different, so I’ve included detailed instructions below.
Note; this assumes you have Visual Studio 2015 Update 1 and ASP.NET 5 RC1 Installed. If not you can get both from the following links:
Create a new ASP.NET 5 MVC Project
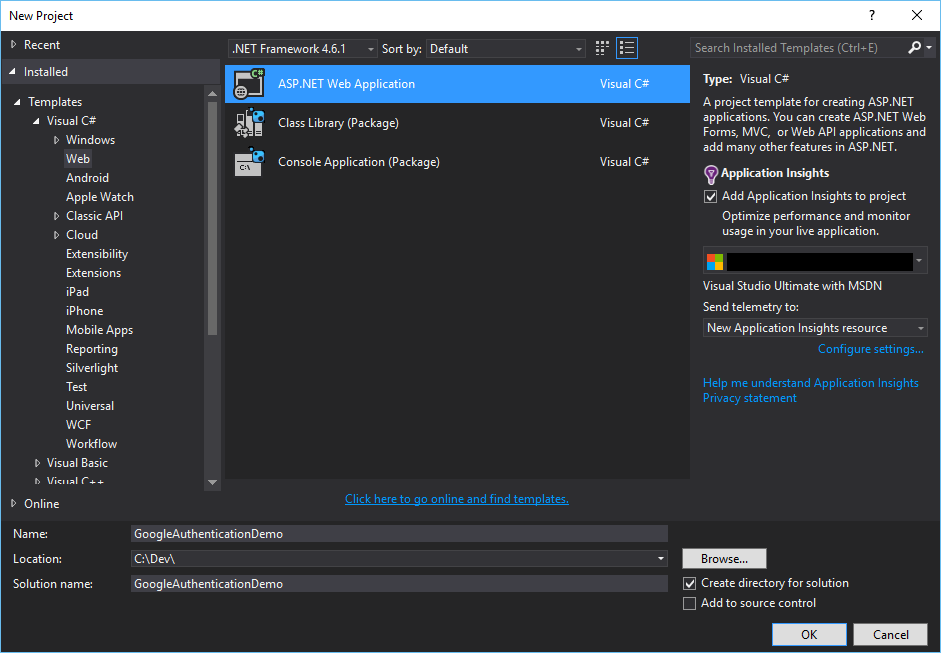
Go to File -> New Project

Select ASP.net Web Application. Name your App and hit Ok
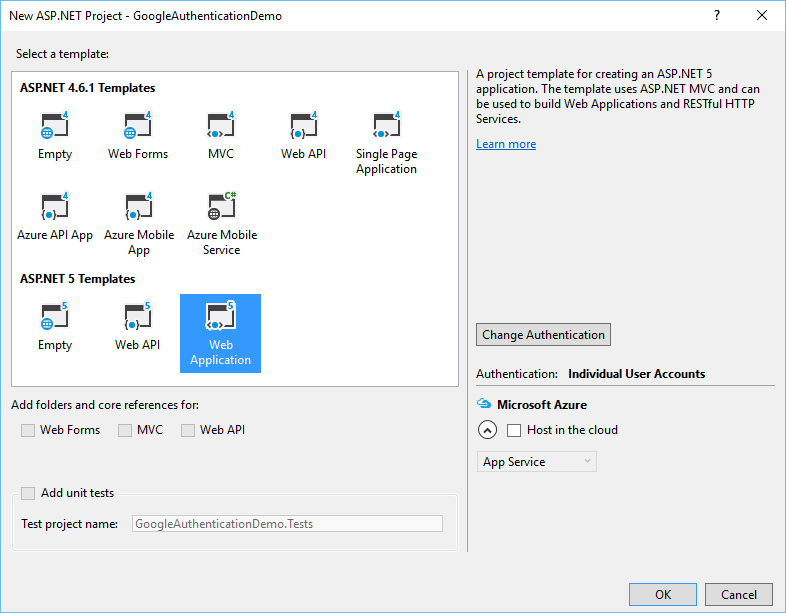
Select Web Application under “ASP.NET 5” Templates
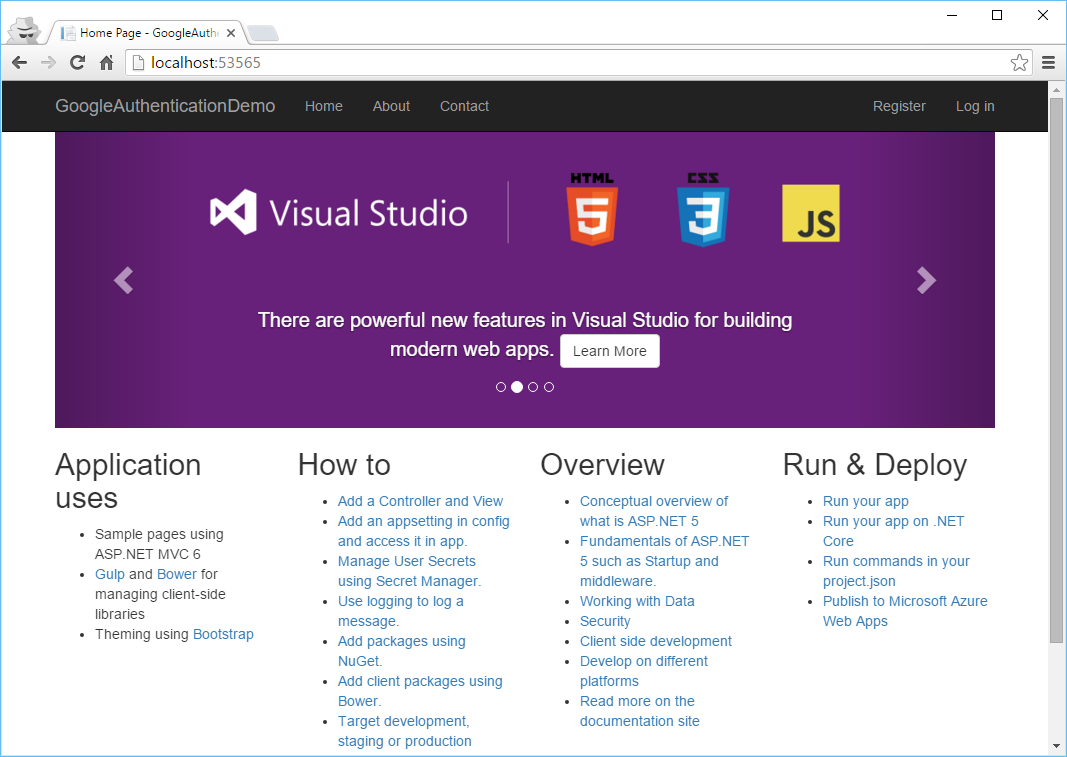
Let Visual studio create the project and automatically restore the packages.
Once the solution loads, hit CTRL+F5 to run your app. Note the URL it runs on and copy this URL as we will use it later.
Setup and Create a new Google OAuth 2.0 Client ID and Secret
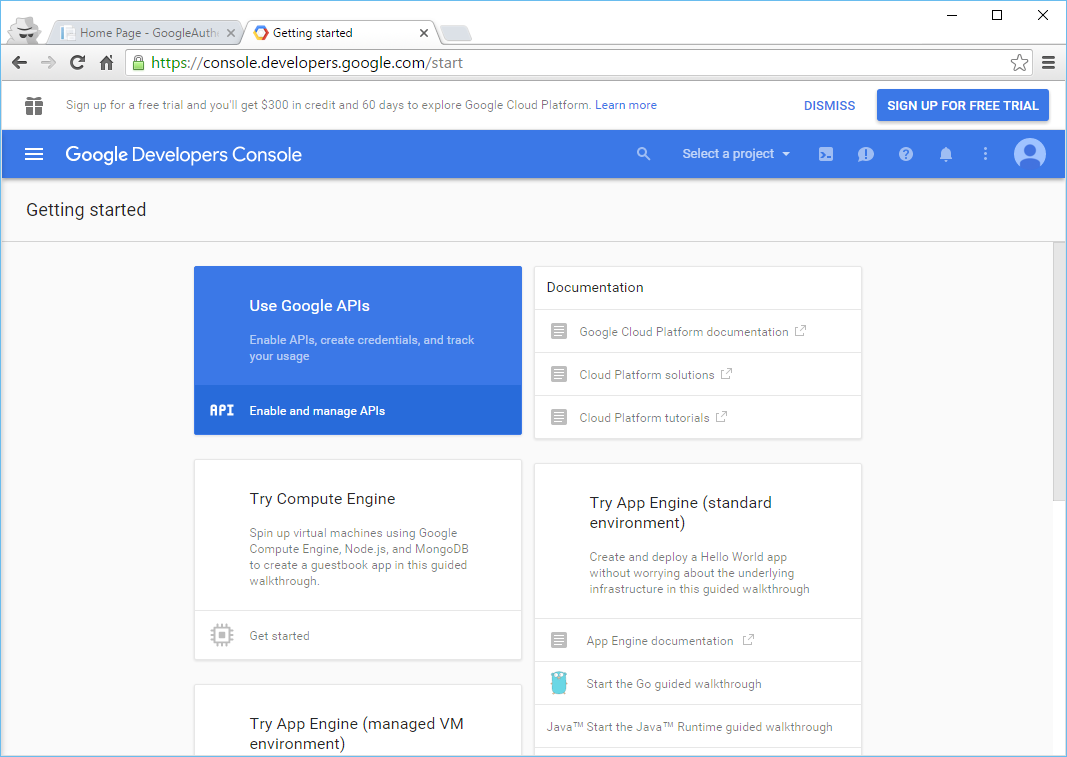
Head over to https://console.developers.google.com and sign in with your Google account
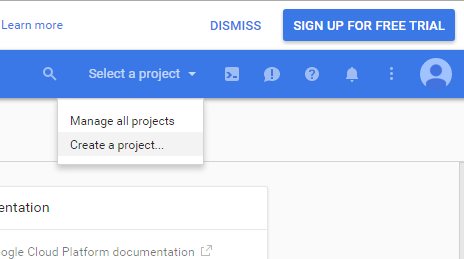
In the top right click on the “Select a project” drop down and choose “Create a project”
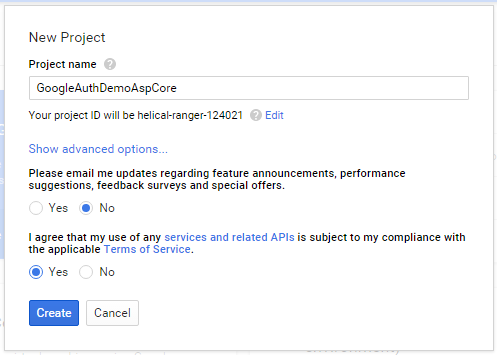
In the new project dialog that pops up enter a name for your project, agree to the terms and click “create”
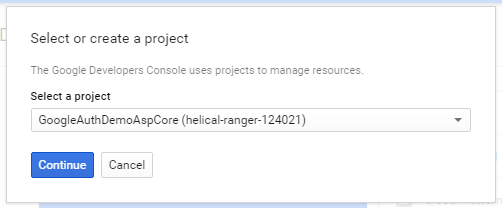
You will now be returned to your dashboard. Click on Enable and Manage API’s

In the window that pops up choose the project you just created and hit continue
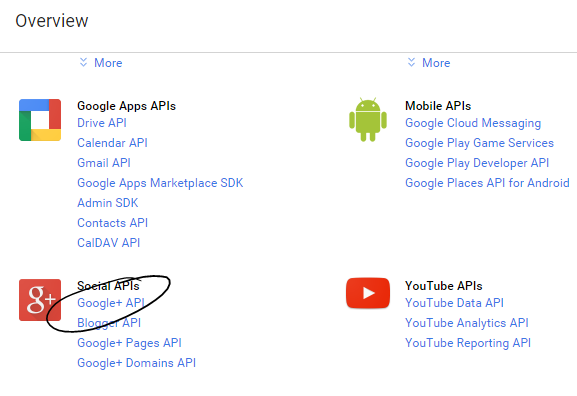
On the next page scroll down and click on Google+ API
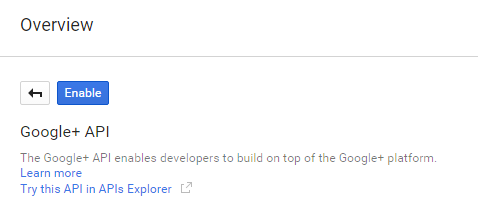
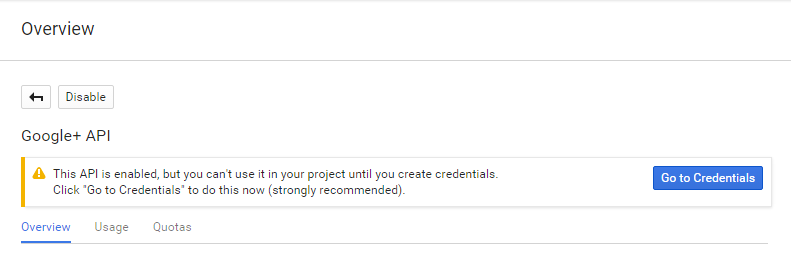
On the next screens click Enable and then Go to Credentials
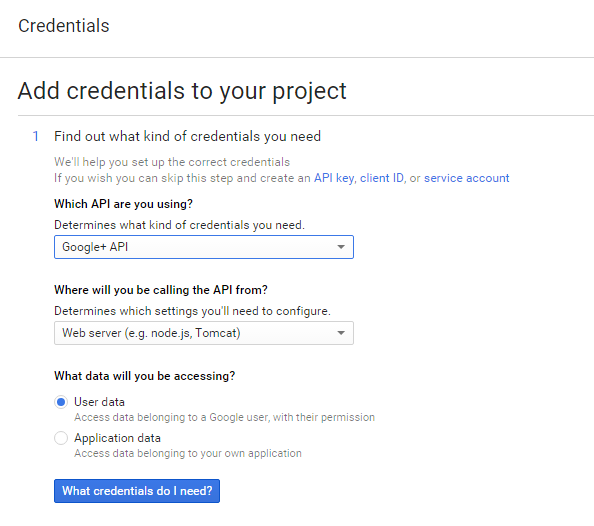
On the Add Credentials screen choose Google+ API and Web server from drop downs. Choose User data under “What data will you be accessing” and click “What credentials do I need”
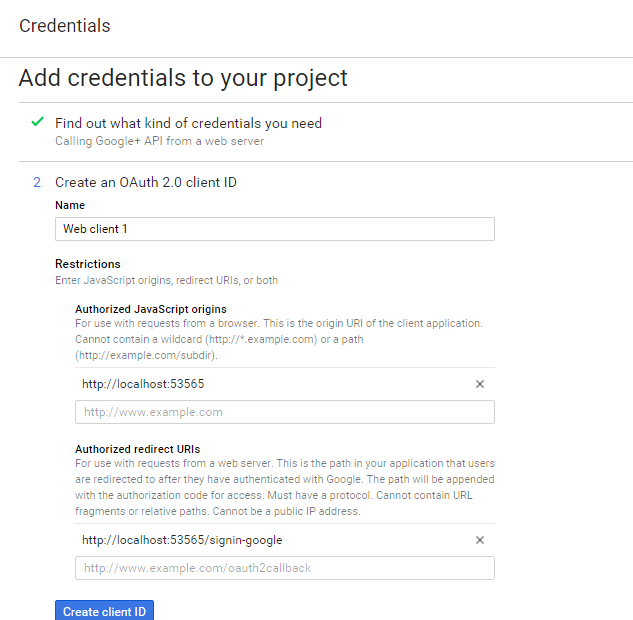
Remember how I had you save the url of your project? There is where we enter it. In the first box enter in the URL and make sure to remove the trailing / . In the second box add the same url but end it with /signin-google . Once you have done this click on Create client ID
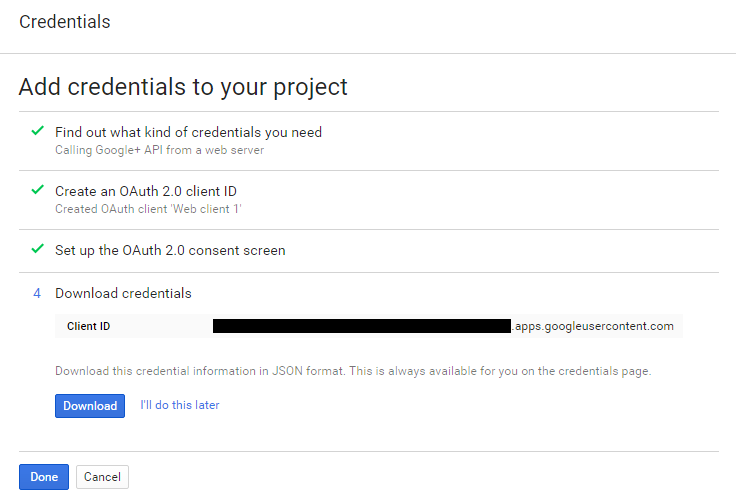
The next screen will let you customize the Google Consent page. This is the page the users see where they have to allow you to access their data. Just enter in a product name for now and click Continue

You are now done! Google only shows you the Client ID right away so I will show you how to go back and display your Client ID and Client Secret. First click Done on this screen
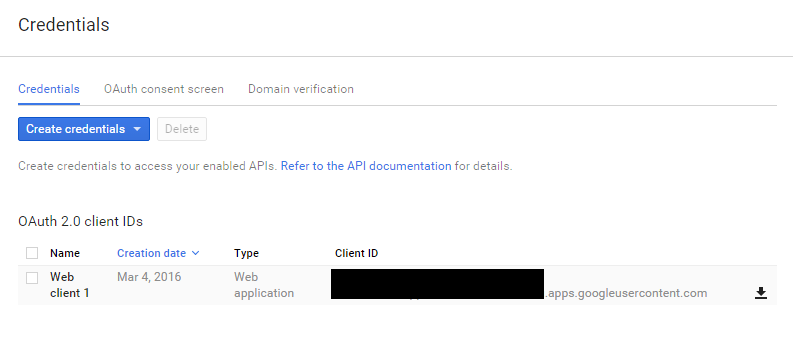
The next screen shows all the credentials you have setup. Simply click on the first credential name.
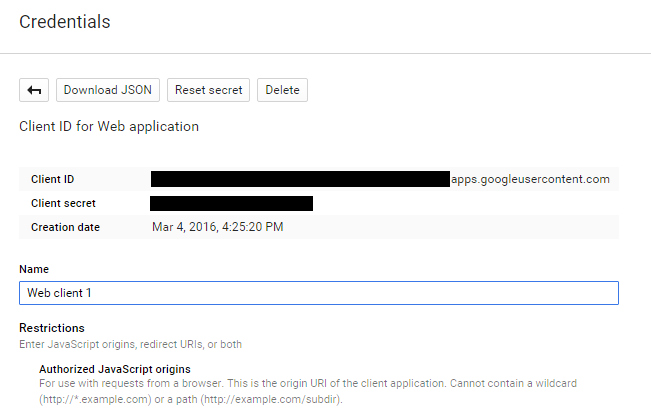
This screen now shows your Client ID and Client Secret. Make note of both of these because we are going to use them in your project.
Setup your ASP.NET Core Application with Google Authentication
Now that we have the project setup and your Google Client ID and Secret, we simply need to modify the project to use Google Authentication.
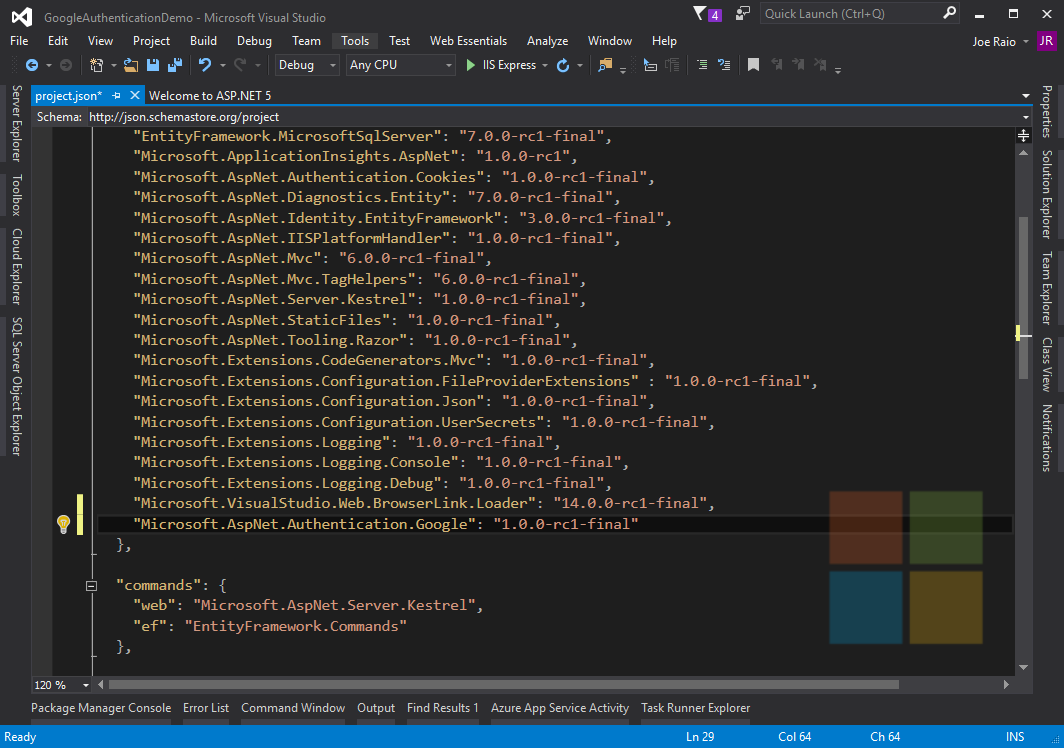
First we need to install the Google Authentication Nuget package. To do this, let’s switch back over to Visual Studio and open up your project.json file. In the dependencies section add the following piece of code to the end.
"Microsoft.AspNet.Authentication.Google": "1.0.0-rc1-final"
It should look like this
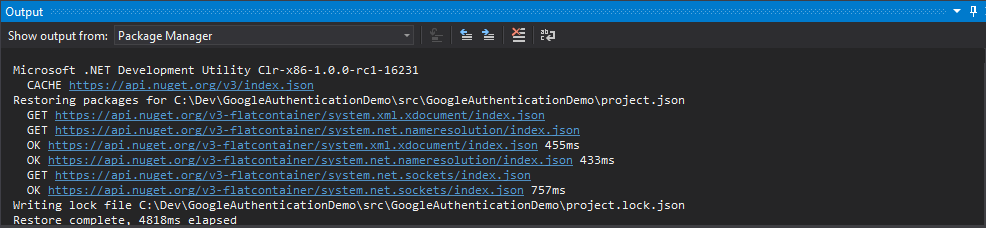
Notice that when you do this, Visual Studio will automatically download and install the Nuget package setting up all your reference for you.
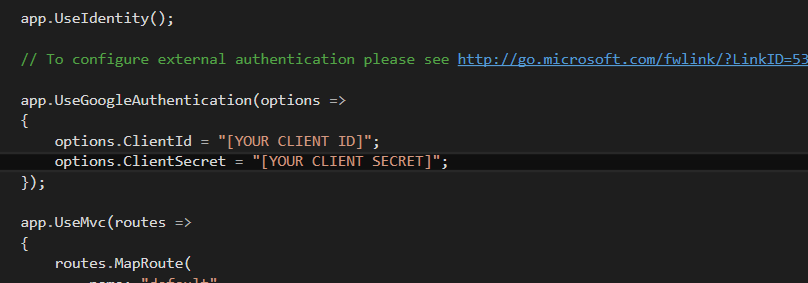
Now lets open up Startup.cs add add the following code. NOTE: It is important you add this code after app.UseIdentity(); and before app.UseMVC()
app.UseGoogleAuthentication(options =>
 {
 options.ClientId = "[YOUR CLIENT ID]";
 options.ClientSecret = "[YOUR CLIENT SECRET]";
 });
It should look like the following. Of course replace the values with your Client ID and Client Secret
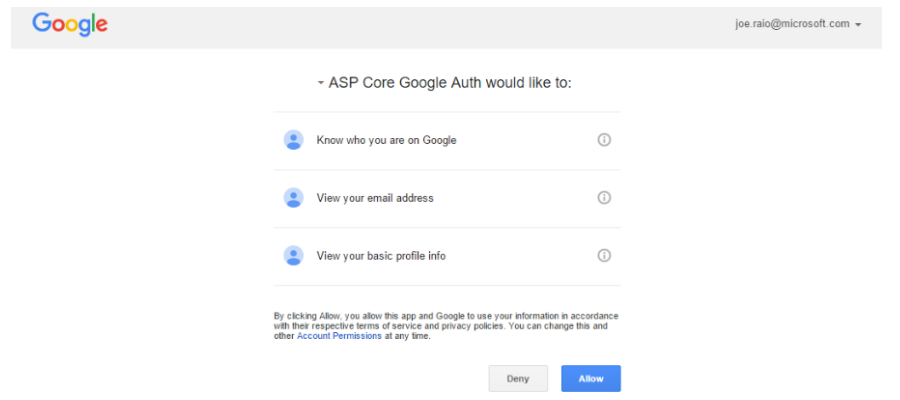
Let’s now run the project, CTRL + F5, and click login in the upper right hand corner. You should now see a page similar to the one below.
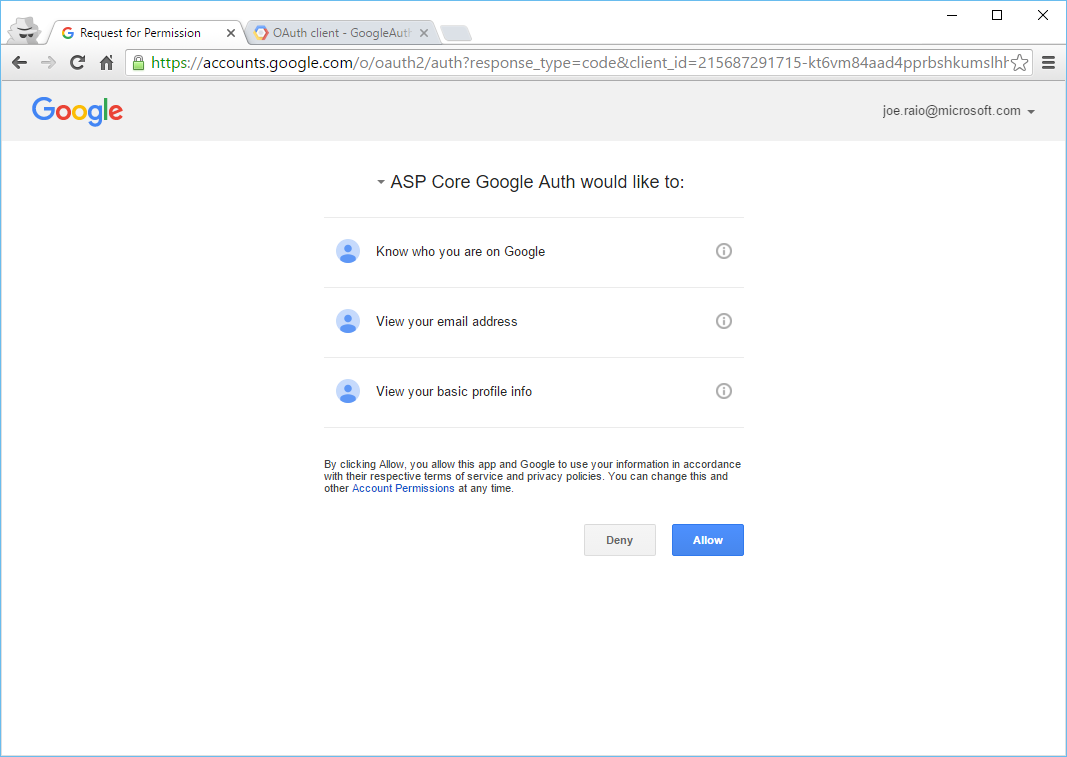
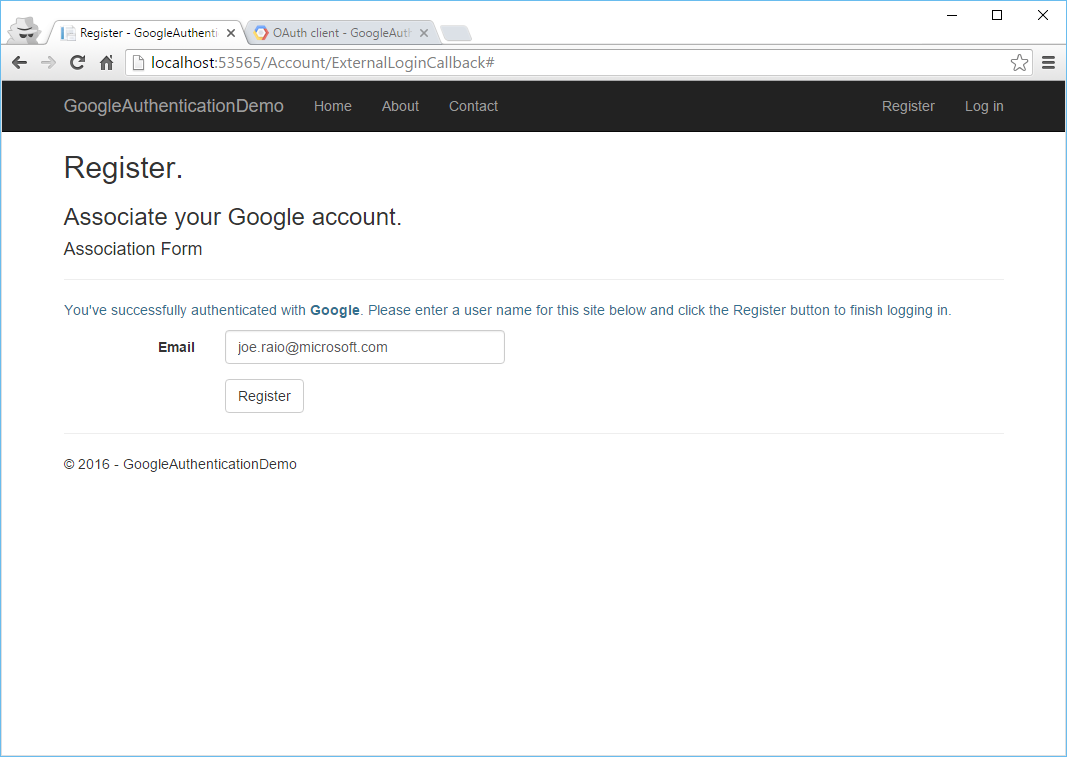
Once the user hit’s allow they can authenticate using Google.
Technically we have done everything to get Google Authentication working. But, being I started from a brand new project I am going to continue and show you how to update the database use a migration so that the project will run properly.
Applying a database migration using DNX
If you followed this tutorial from the very beginning and started with a new project, you will get an error after hitting “Allow” similar to the one below.
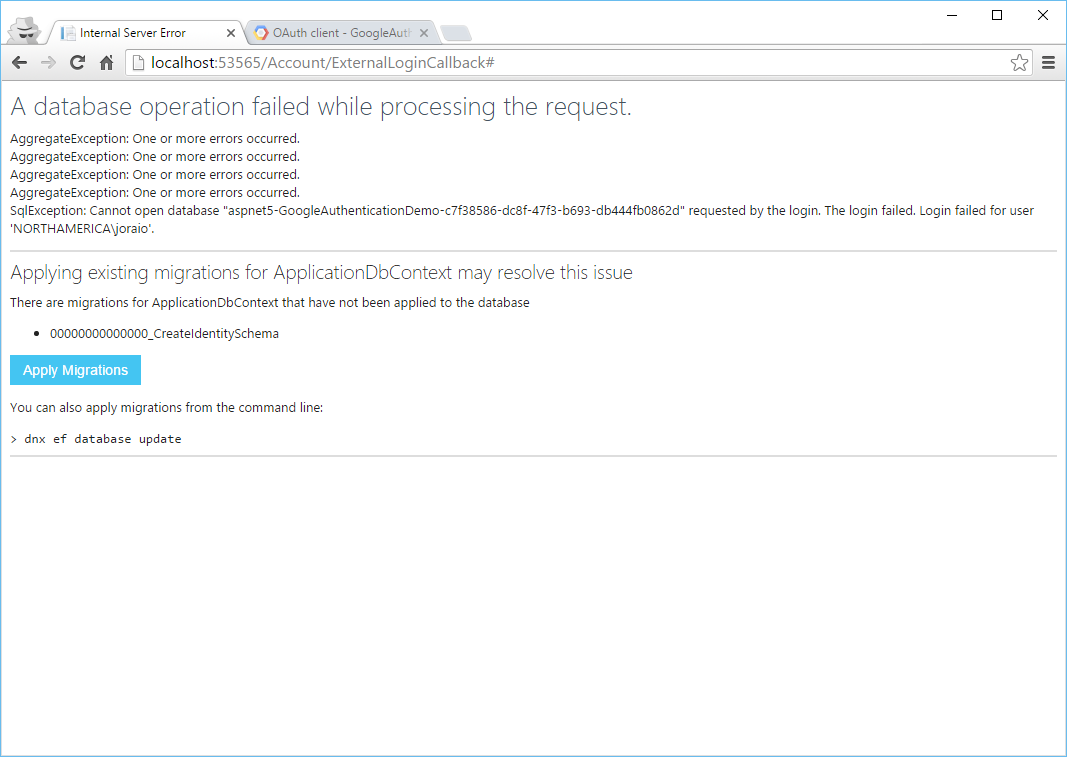
How to we fix this? Easy, open up a command prompt in the project folder. Run the command “dnx ef database update”. This will apply the initial database migration.

Once you have done that, refresh your page and you are good to go! It should ask you to finish setting up your account and then log you into the site.
I hope you found this tutorial helpful! Happy Coding!